+1 Arm Length Arms and Equipment Tier List
Which arm upgrades are worth your Wins in Meadow, Ice, Lava, and Golden Dunes—and which to skip.
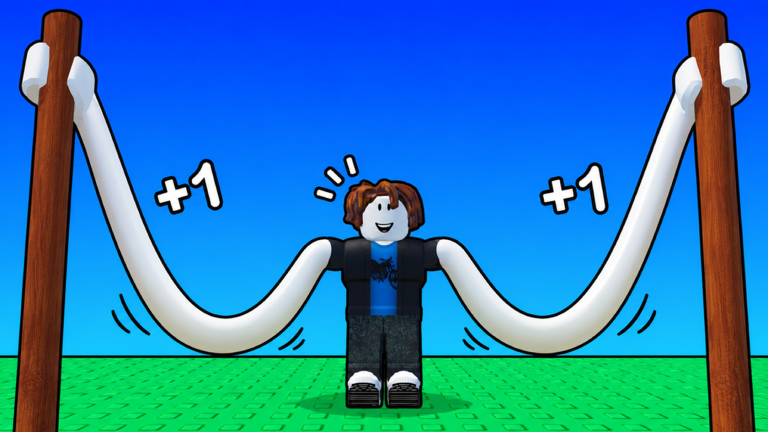
Arms are the fantasy and the math of +1 Arm Length. Longer arms and higher Power stretch your launch down the rainbow track, which means more Wins, which means better fists, pets, and rebirths. This page ranks arm and related equipment purchases by progression value: how much Power or length you gain for the Wins you spend, and when that purchase matters in the climb from Meadow through Ice, Lava, and World 7 Golden Dunes. Meta shifts when Strong Bunny Studio retunes shops, so treat tiers as living priority orders. For pets, use the separate pets tier list. For methodology, see the Tier List Hub.
How to read these tiers
- S tier — Best Wins efficiency or mandatory gates for the stage. Buy when you can afford them without starving the next rebirth.
- A tier — Strong upgrades that fit most builds. Slightly worse ratio than S, or more situational.
- B tier — Acceptable bridges when S/A are gated or too expensive right now.
- C tier — Fillers, vanity-leaning buys, or traps that look cool but stall your launch distance.
Fists are included as equipment partners because they share your Wins wallet. A great arm with a neglected fist often underperforms a balanced pair. Deeper pet synergy lives in pets and fists.
Early game (Meadow) priority
New accounts should not chase endgame Golden Dunes arms. Your job is to make the first launches consistent and to unlock rebirth multipliers without bankruptcy.
S tier — early
- Starter-to-second Meadow arms that clearly raise length or Power for a modest Wins cost. These pay for themselves inside a short train-and-launch loop.
- First meaningful fist upgrade if it improves hit timing or Power gain during training. Perfect Rhythm sessions feel better with a fist that matches your current arm tier.
- Any arm that unlocks a noticeable launch distance breakpoint required to farm Wins faster than idle claiming alone.
A tier — early
- Mid-shelf Meadow arms that cost more but keep you from soft-locking before Ice.
- Temporary Power potions used only when you are one run away from a shop threshold (see event notes on the Scripts Hub only as feature context; prefer manual play).
B tier — early
- Cosmetic-leaning arm skins that do not move stats.
- Duplicate low-tier arms bought out of boredom.
C tier — early
- Expensive showcase arms aimed at late worlds.
- Spending your entire bank on one flashy fist while your arm length is still too short to finish basic track segments.
New player buy order: claim Daily and Group Chest → buy the cheapest S-tier arm you still lack → train → launch → repeat until the next S/A upgrade or first rebirth. Follow Getting Started and how to train so rhythm quality multiplies each purchase.
Mid game (Ice and Lava) priority
Ice and Lava raise the Power floor. Arms that were S in Meadow can fall to B if their scaling is flat. World-appropriate shop rows usually beat nostalgic starter upgrades.
S tier — mid
- Ice-gated arms with the best Power-per-Wins on the Ice shelf.
- Lava arms that restore launch distance after the difficulty spike.
- Equip-best fist path when the menu shows a clear upgrade over your equipped fist. Keeping the best fist equipped is free value after the purchase.
- Upgrade Equipped style spends that reinforce the arm you actually launch with, not a warehouse full of unused models.
A tier — mid
- Bridge arms that unlock comfort while you save for the next S purchase.
- Balanced fist upgrades that help boss fights if you are farming boss rewards for materials.
B tier — mid
- Older Meadow arms you already outgrew; do not repurchase equivalents.
- Side-grade fists with tiny Power bumps and large price tags.
C tier — mid
- Hoarding five mediocre arms instead of one strong equipped arm plus a rebirth buffer.
- Event crate arms that cost more in tokens than their stats justify while Lava still feels hard.
Mid-game players should sync arm buys with rebirth timing. If a rebirth multiplies training income by more than the next arm’s relative gain, rebirth first, then buy. Details live in the rebirth guide.
Late game (World 7 Golden Dunes and high rebirth)
Golden Dunes rewards long setups: desert routes, farther launches, and pets that keep training dense between runs. Late S-tier is about sustaining Power growth when Wins numbers look huge but upgrades are steeper.
S tier — late
- Golden Dunes shop arms with the strongest length/Power gain per Win on the desert shelf.
- Top-end fists that stay equipped through boss loops and long train sessions.
- Arms that unlock or stabilize the farthest launch segments you can currently finish without soft fails.
A tier — late
- Near-best arms that are affordable while you wait for a jackpot crate or index reward.
- Situational boss-reward arms that fill a gap until the true S purchase.
B tier — late
- Mid-world arms kept only for collection; unequip them from active slots.
- Token-shop fillers during Halloween if permanent desert arms are available.
C tier — late
- Early Meadow leftovers still sitting equipped out of habit.
- Any purchase that empties your rebirth reserve when the next multiplier is one session away.
Late players should also track index rewards and fusion-adjacent gear goals so arm spending does not starve pet slots. Cross-check worlds guide when a new gate appears.
Practical priority orders
Brand-new player (first hours)
- Free claims (Codes Hub).
- Cheapest arm that increases length/Power.
- Train with rhythm, launch, earn Wins.
- First fist upgrade if training feels weak.
- First rebirth when the game signals a clear multiplier gain.
- Ignore desert and event flex arms.
Returning mid player
- Unequip outdated Meadow gear.
- Buy the best Ice/Lava arm you can afford without skipping rebirth.
- Equip best fist.
- Push world entry requirements.
- Only then open crates for chance arms.
Late / Golden Dunes player
- Maintain rebirth cadence.
- Buy desert S-tier arms on schedule.
- Keep pet slots optimal so training keeps pace with arm costs.
- Spend event tokens only when the expected Power beats the permanent shop option.
Common mistakes
- Buying every arm in order like a completionist checklist when a skip is cheaper overall.
- Ignoring fists until launches feel mysteriously weak.
- Spending code Wins on C-tier cosmetics.
- Refusing to rebirth because you like your current arm length number more than your multiplier.
- Copying a leaderboard flex loadout that costs more Wins than you earn in a day.
Related pages
Arms win when they buy distance. If a purchase does not help the next launch or the next rebirth, it is not S-tier for you right now—even if it looks incredible in the shop preview.
Frequently Asked Questions
Quick answers for +1 Arm Length players.
What makes an arm S-tier in +1 Arm Length?
Strong Power or length gain relative to its Wins cost at your current stage, plus helping you finish farther launches or hit the next world gate without starving rebirths.
Should I buy every arm in the Meadow shop?
No. Skip weak fillers if the next efficient upgrade or a rebirth multiplier gives more progress per Win.
Do fists matter as much as arms?
Yes for training feel and Power. A balanced arm-plus-fist pair usually beats an expensive arm with a neglected starter fist.
Will this arms tier list stay accurate after updates?
Shop balance and new worlds can move tiers. Recheck after major patches and compare Power-per-Wins yourself before huge spends.